 Equipment Set-up Equipment Set-up
|
|
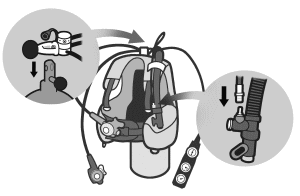
1. Turn the tank valve so its opening faces the BC. Tightly fasten the tank belt, ensuring that the tank is properly positioned. You can lift the BC to make sure the tank does not slip.
|
|

Be Careful of Tank Placement
|
|
2. Making sure that the second stage (regulator) is on the right side of the BC, take off the first stage’s dust cap, and place over the tank valve’s yoke screw. Tighten. Make sure to also connect the BC inflator hose. |
|

Set-up |
|
3. After placing the pressure gauge face down, slowly open the valve. Once the valve has been opened fully, turn back 1/4 turn, to ensure it can get stuck in the open position. |
|

i) Place the pressure gauge face down ii) Open the tank valve slowly |
|
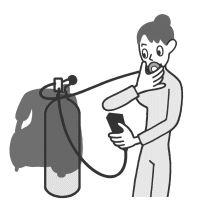
4. Check the pressure gauge to ensure sufficient air for the dive. Make sure the regulator, octopus and inflator are all working fine, as well as that the air quality is good. If you won’t be entering the water soon, lay the BC and tank on its side. |

Take a breath off the regulator to check out the air – is it good and sufficient? |
|
5. Finally, after completing your set-up, you check (and vice versa) your dive buddy’s equipment to make sure it is set up and working properly. We call this a “Buddy Check”. |

Buddy Check |
|

